
Outlook Web Access
Logging In at http://mail.kua.org/exchange/
How to login: Open a web browser and type in the following URL: http://mail.kua.org/exchange/
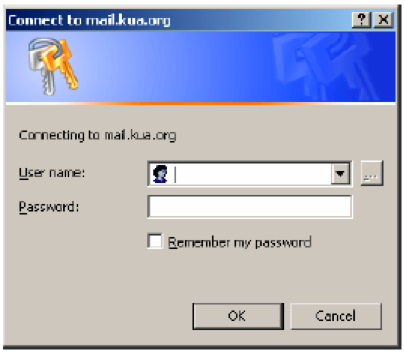
When the login screen pops up, enter your Domain username, password. DO NOT check Remember my password.
Outlook will open, and a menu bar will appear on the left. The Menu offers a number of shortcuts to your personal folders, as well as a listing of your private and public folders. The two views available in the Outlook Bar are Shortcuts and Folders. You can switch between the two views by clicking the tabs at the top and bottom of the Menu Bar.

Note that Internet Explorer disables pop-up windows by default. You must enable pop-up windows for this site for many of the features to work.
Part I: Email
Inbox Overview
To open your Inbox:
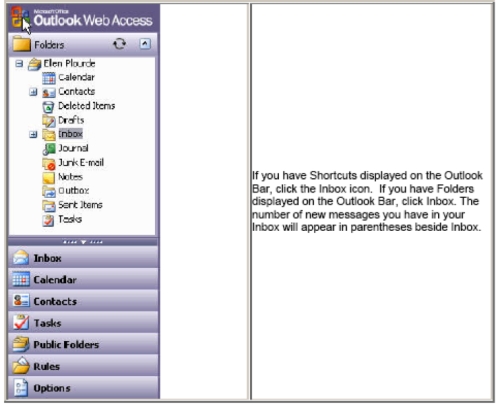
The Inbox displays new messages in boldface. Once read, the messages will revert to normal type
Reading Messages
To open an e-mail message: Locate the message you want to read. Double-click the message to open it, or select the message, and press ENTER. When you open an e-mail message in Outlook Web Access, it is displayed in the Read Message form. The following basic information is displayed in the Read Message form heading:

Replying to or Forwarding a Message
To respond to a message you have read, in the Read Message form toolbar, click the Reply, Reply to all, or Forward buttons.
When you click Reply, the To field is preaddressed to the sender of the original message. When you click Reply to all, the To and Cc fields are preaddressed to the sender as well as every other recipient of the original message. When you click Forward, you have to fill in all address fields, just as you do when addressing a new message.
The text of the original message is copied in the message body. You can type your response within or above the sender’s original message.
Deleting Messages
You can delete an individual message from your e-mail folders, or you can delete several messages at a time.
To delete an open message, on the Read Message form toolbar, click Delete.
To delete a message or multiple messages from a folder in the main Outlook Web Access window, first select the messages. To select consecutive messages, (messages that are next to each other in the list) click on the first and last messages in the series while holding down the SHIFT key. To select non-consecutive messages, hold down the Ctrl key as you click on each message you want to delete. With the messages selected, on the main Outlook Web Access toolbar, click Delete.
Note that all deleted messages are sent to the Deleted Items folder. They are not permanently removed until they are deleted from the Deleted Items folder. This is important. If you do not empty your Deleted Items folder it is possible that you will go over the limit for messages on the mail server and will be unable to receive any new mail.
To empty everything in the Deleted Items folder go to the folder and click the trash can icon:

Composing and Addressing a New Message
To Compose a new message:
Click the NEW button from the top left, use the drop down arrow to select New mail message.
In the To and Cc fields, type the names of the recipients. Separate multiple names with semicolons (;).
When adding an address, you can also click the To or Cc buttons. This will open the Find Names dialog box, which allows you to search through your organization’s global address list for a particular recipient. Once you locate a person through Find Names, their name can be added directly to your e-mail message.
To add blind carbon copy recipients, in the Bcc field, type their names, or click Bcc to open the Find Names dialog box. Bcc recipients receive a copy of the message, but their names do not appear in the list of recipients. Each Bcc recipient cannot see the names of other Bcc recipients. • In the Subject field, type a brief subject line.
Type your message in the message body.
When finished composing, click the SEND button.
Reading and Saving Attachments
An attachment is a file that can be created in any program and attached to an e-mail message, such as a Microsoft Word document, a Microsoft Excel spreadsheet, a .wav file, or a bitmap. When a message contains an attachment, Outlook Web Access displays a paper clip symbol beside it in the folder listing.
When the message is opened, you will see the name of the attached file in the message heading information. Some attachments, such as .txt and .gif files, will be opened directly by the Web browser.
When you double click the name of the attachment, a dialog box opens asking if you want to open it or save it.

If you choose to open it the document will open, you can read or print it. If you want to save the attachment, click Save. By default things get saved in your My Documents folder but if you click the down arrow next to My Documents you will see that you can save it anywhere you like, including your KUA network drive.

Attaching a File
In the attachments screen you can attach any type of file that is accessible from your computer or through your network. This utility also allows you to remove attachments.
To attach a file to an e-mail message.
1. Click the Add Attachment icon when creating your message, appointment, or contact. It looks like a paperclip.
![]()
2. In the Attachments Dialog, Under Choose a file to attach, type the path to the file, or click Browse to navigate to the file.

3. Click Attach and the file will appear under Current file attachments. Repeat steps 1-3 for any additional files you want to attach. You MUST click Attach.

4. To return to the message window you were working in, click Close. The file(s) you selected will now appear in the heading, beside Attachments.
Folders
The Folders tab displays your personal folders. A plus-sign [+] beside a folder will indicate that there are sub-folders nested within them. To view the next level in the folder hierarchy, click the plus-sign. When you click on any folder in the Outlook Bar, its contents will be displayed in the Outlook Web Access viewing panel.
Clicking the plus sign displays subfolders
To create a subfolder of your Inbox (a good way to organize your e-mail) right-click Inbox and choose New Folder.
You could create a folder for each class and save mail from your teachers in separate folders.
To make a new subfolder of your Inbox, right-click on Inbox and choose new folder.
A dialog box will open and you’ll name the folder. Click OK.


About Rules
You can manage your e-mail messages by using rules to automatically perform actions on incoming messages. After you create a rule, Microsoft Office Outlook Web Access applies the rule to messages that arrive in your Inbox. For example, you can automatically save all messages from your advisor in a special folder when they arrive in your Inbox.
1. In the Navigation Pane, click Rules.
 2. In the Rules screen, click New.

3. In the Rule Name box, type a name for the rule if you want to give the rule a specific name. If you leave this box blank, Outlook Web Access will generate a name from the rule criteria you specify (for example, “Sent only to me”).
You can specify subject, who the messages are from and what should happen to them.
You may also create a rule based on a message you’ve received. Select the message and right-click. Choose Create Rule. The rule dialog box will open. Much of the information will already be entered for you.

4. In the Edit Rule dialog box, specify any or all of the following conditions:
• To base the rule on who sent the message, type the alias or e-mail address of the user name or distribution list in the From field contains box. To find the person or distribution list in your organization’s address book or your contacts, click Address Book .
• To base the rule on words in the subject of the message, type the words in the Subject contains box.
• To base the rule on the importance setting of the message, select the importance in the Importance is menu.
• To base the rule on who the message was sent to, type the alias or e-mail address of the user name or distribution list in the People or Distribution
• List box. Separate two or more entries with a semicolon (;). To find the person or distribution list in your organization’s address book or your contacts, click Address Book .
• To base the rule on messages that are sent only to you, select the Sent only to me check box.
5. Specify what to do with the message if it meets the conditions you set in step 4:
• To move the message to a folder, select Move it to the specified folder, click specified, and then select the appropriate folder in the Move/Copy Item dialog box.
• To copy the message to a folder, select Copy it to the specified folder, click specified, and then select the appropriate folder in the Move/Copy Item dialog box.
• To delete the message, select Delete it.
• To forward the message to someone, select Forward it to, and then type the alias or e-mail address of the person or distribution list in the adjacent box. Separate two or more entries with a semicolon (;). To find the person or distribution list in your organization’s address book or your contacts, click Address Book . By default, a copy of the forwarded message is kept in your Inbox.
6. Click Save and Close. The Rule will not be saved if you just close the window.
Contacts
Contacts is your e-mail Address Book and information storage utility for the people you regularly communicate with. Use Contacts to store the e-mail address, street address, phone numbers, and any other information that relates to the contact. This can include Web pages, birthdays and anniversaries, and fax or cell phone numbers.
You can sort or group contacts by any part of their name, or by other contact information. You can also move or copy a contact to a different folder, or attach a file, such as a Microsoft Word document, to a contact, to keep related information together.
Create a New Contact
1. In Contacts, on the toolbar, click New.
2. In the new contact window, on the General tab, type the information you want to include for the contact.
Tip Use the drop-down lists to record multiple entries in some boxes. For example, the drop-down list next to the E-mail icon allows you to store up to three different e-mail addresses for a contact (E-mail, E-mail 2, and E-mail 3). You can also store multiple addresses and phone numbers.
3. If you have multiple addresses stored for a contact, you can designate one as the contact’s mailing address. Select the address in the list, and then select the Mailing address check box.
4. On the Details tab, you can fill in additional information about a contact.
5. Click Save and Close, and then refresh your browser window to see the new contact.
Note Use the File As list on the General tab to determine how the contact will appear in Contacts. You can display each person by first and last name, by last name first, or by company name.
Open a contact
To view all the information you have stored for a contact, you’ll need to open the contact.
• In Contacts, double-click the contact you want to open.
Create a Distribution List
If you regularly send e-mail messages to a group of people, you can create a distribution list to simplify addressing messages… After a distribution list is created, you can send a message or meeting request to multiple recipients at the same time. Distribution lists can include anyone with a valid e-mail address.
1. On the main toolbar, click the arrow next to New, and then click Distribution List.
2. In the new distribution list window, in the List Name text box, type the name of your new distribution list.
3. To add a member of your organization to your distribution list, click Find Names. Use the Find Names dialog box to locate the person in your organization’s global address list or your contacts, and then click Add recipient to…Distribution List. Repeat this step for each person you want to add.
Note you can also type the e-mail addresses or aliases for the people you want to add in the Add to Distribution List text box.
4. To add a personal contact or person outside of your organization to your distribution list, type the contact’s name or the person’s e-mail address in the Add to Distribution List text box, and then click Add. Repeat this step for each person you want to add.
Click Save and Close. The list will not be saved if you just close the window
Tip To delete the distribution list from your address book in the new distribution list window, click Delete on the toolbar. To send a message to all the members of the distribution list, click Send mail to list.
The Global Address List
The Global Address list contains the e-mail addresses of everyone at KUA. Click the Address book icon on the menubar.
This will open the Find dialog
![]()

The Find Feature works to find another students address if you type the name in the Alias box and click Find. You can type in just part of the name, click Find and a list of possible names will be returned.
Public Folders
Public Folders contain (surprise!) public documents that are shared with everyone at KUA. The document of most interest to students is the Academic Year calendar. To access it, click the Public Folders tab in the Navigation Pane. A new Explorer window will open. You will have to click the plus sign by Academic Year to show the items inside that folder.


There are two calendars in the Academic Year folder, 05-06 Academic Year and Tech Lab Schedule. Select one or the other to view. By default they open in Day view but you can also view by week or month
Some Ways of Taming SPAM
1. Select a message, Right-click and choose Add Sender to Blocked Senders List

2. Create a Rule, as discussed above. Specify that the Spam be deleted
3. Sort Messages by sender or subject to get a list that can be deleted as a body by using Shift-click
4. Do not give out your e-mail address on websites. Don’t post your e-mail address on websites. Don’t sign up for free offers.
If you already have a lot of spam messages: to delete it quickly, sort messages by sender, click the first in the list, hold down the SHIFT key and click the last in the list. This will select the whole list. Then hit delete.
Selecting a Series of Messages for Deletion
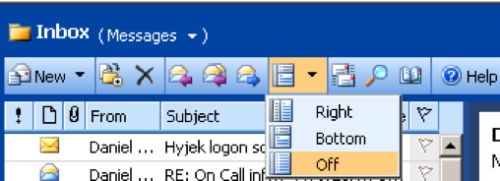
Turn the Reading Pane off to see more messages at one time

Click on the From header to sort by Sender. Click the first message in the list, hold down the SHIFT key and click the last in the list to select all messages from one particular sender. Click the X on the toobar or hit the Delete key.
